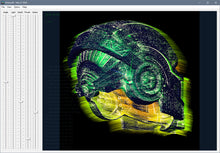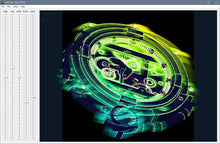
!!! ATTENTION !!! LASER ENGRAVERS ARE NOT CAPABLE OF PRODUCING SPECULAR HOLOGRAMS LIKE THOSE THAT ARE SHOWN IN THE VIDEOS BELOW. WE DO NOT OFFER TUTORIALS FOR CREATING SPECULAR HOLOGRAMS. PLEASE READ THE ENTIRE LISTING BEFORE PURCHASING HOLOCRAFT.
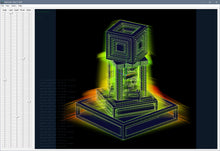
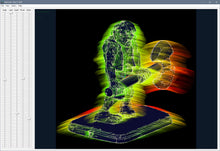
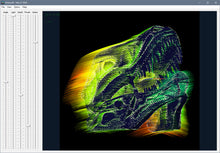
Holocraft is a 64-bit Windows application that enables the creation of specular holograms from 3D geometry by algorithmically choosing points across a model's surface to be depicted as sharp single glints of light that are reflected by groove "optics". The holographic effect that results is similar to that of "scratch holograms" which instead use circular arc grooves that result in a hologram which becomes distorted outside of a very narrow viewing angle, or must depict a scene very deep behind the hologram's surface. Specular holograms remedy this issue and produce a much more convincing holographic effect than scratch holograms can - especially holograms that appear to intersect the hologram's surface (i.e. partially in front and partially behind).
Holocraft outputs simple Mach3 compatible G-code and SVG vector paths for a hologram's reflective groove optics, and accepts 3D model formats such as binary Stereolithography/STL and ASCII Wavefront/OBJ model files. Generating a hologram is computationally intensive and models should not have excessive numbers of vertices and triangles.
Here are some older videos of holograms created using Holocraft:
Here are holograms that have been created by Matthew Brand which comprise the Light Grooves art installation at the Museum of Math in New York. These were not made using Holocraft and are only shown to further demonstrate the concept and effect produced by specular holograms:
Holocraft is an ALPHA version that's sold AS-IS. It is used for generating the position and shape of reflective optics for a specular hologram from 3D model geometry and does not automagically "convert" a model into a hologram. It is a tool for artists with a DIYer's spirit who are willing to take the time to figure out what makes a good hologram through trial-and-error with the software itself and the means and materials they are working with. It is not for the faint of heart who are unable to solve the problems they encounter on their own!
To fabricate a hologram its optics are scored mechanically at high feed rates into metals and plastics using a 3-axis CNC machine with a tool that either has a very finely rounded point (e.g. radius < 0.005" or 0.125mm) or a taper angle that matches the planned illumination angle. Laser engraving machines vaporize or burn material away which will not produce a glossy smooth mirror-like reflective surface for light to sharply glint off of. A finer tool will allow for holograms with a denser optic distribution. No spindle is required, the tool only needs to be (rigidly and without deviation from machine flexure) dragged across the material's surface to embed the groove optics into it. Diamond-drag bits may not work as well for producing a reflective groove unless their tip angle matches the intended illumination angle for the hologram (see the included readme.txt for calculating tool tip angle for a given illumination angle). Holocraft allows for an illumination altitude angle of +90 to +30 degrees above the direction that the hologram is facing, with +90 degrees representing a light shining down onto the hologram from directly above its top edge - which produces the optimal holographic effect. Aluminum plates (1100 and 3000 series alloys) yield optimal reflectivity after a small amount of polishing over the hologram surface using a rag and some polishing compound to bring out a brighter shine from the optics.
Excessive optic density will muddle the holographic effect, due to many intersecting grooves limiting one another's total reflectivity, so it's critically important to find the optimal number of optics for your machine, tools, and the material that you embed a specular hologram into. Illuminating a hologram is best with a point-light source that's placed far enough from the hologram so that the incidence angle of the light is nearly uniform across the hologram's surface. The geometrically ideal light source is at an infinite distance away to ensure that incident light rays are parallel across the hologram's surface. The more parallel the better. A ceiling light can work well enough, provided that it is far enough (~10 feet / 3 meters) from the hologram, and small and bright enough, and there are no other brighter light sources to cause other distracting glints on the groove optics. Large dim peripheral lights are OK.

If you have any questions or need assistance please feel free to send us an email at: support@deftware.org


